
Find out how you can attach policy documents in a faster way through our bulk document importer tool.
Quick 7 Min Tutorial:
Table of Contents
Accessing the Bulk Document Importer Tool
There are two ways to get access to the document importer wizard:
- On the Filings Import log, find the relevant batch to attach policy documents to. Then click on the "Attach Documents" action button.

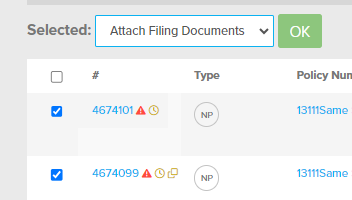
- On the Filings list page, select one or more transactions (check box next to the filing number). Then select the bulk action of "Attach Filing Documents".
Choosing Your Method
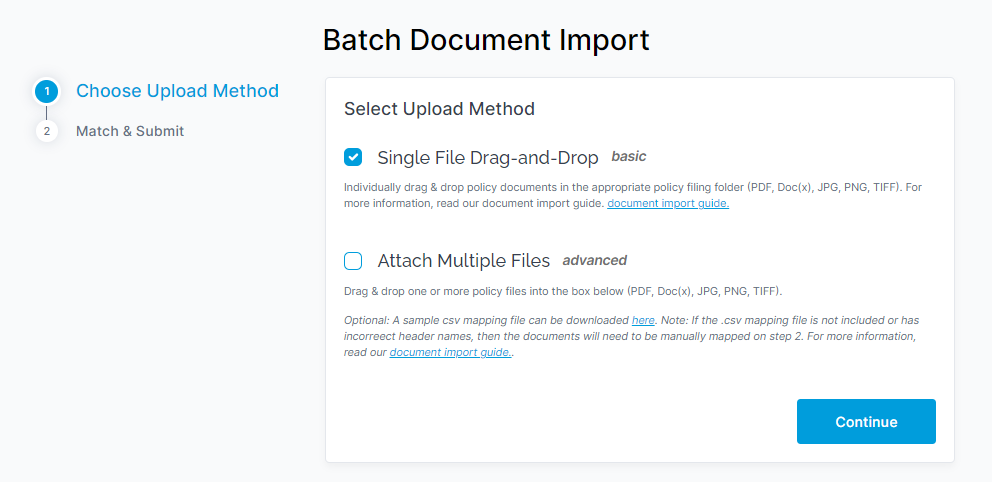
You have the option to attach documents in bulk using two method types:
1) Single File Drag-and-Drop (Basic)
- This approach allows you to have a list of filings on the left side and drag and drop policy documents on the right.
2) Attach Multiple Files (Advanced)
- This approach allows you to attach all your documents at once, and either through a .csv mapping file or through manual effort, map the documents to the appropriate policy transaction and document type.
Single File Drag-and-Drop Method
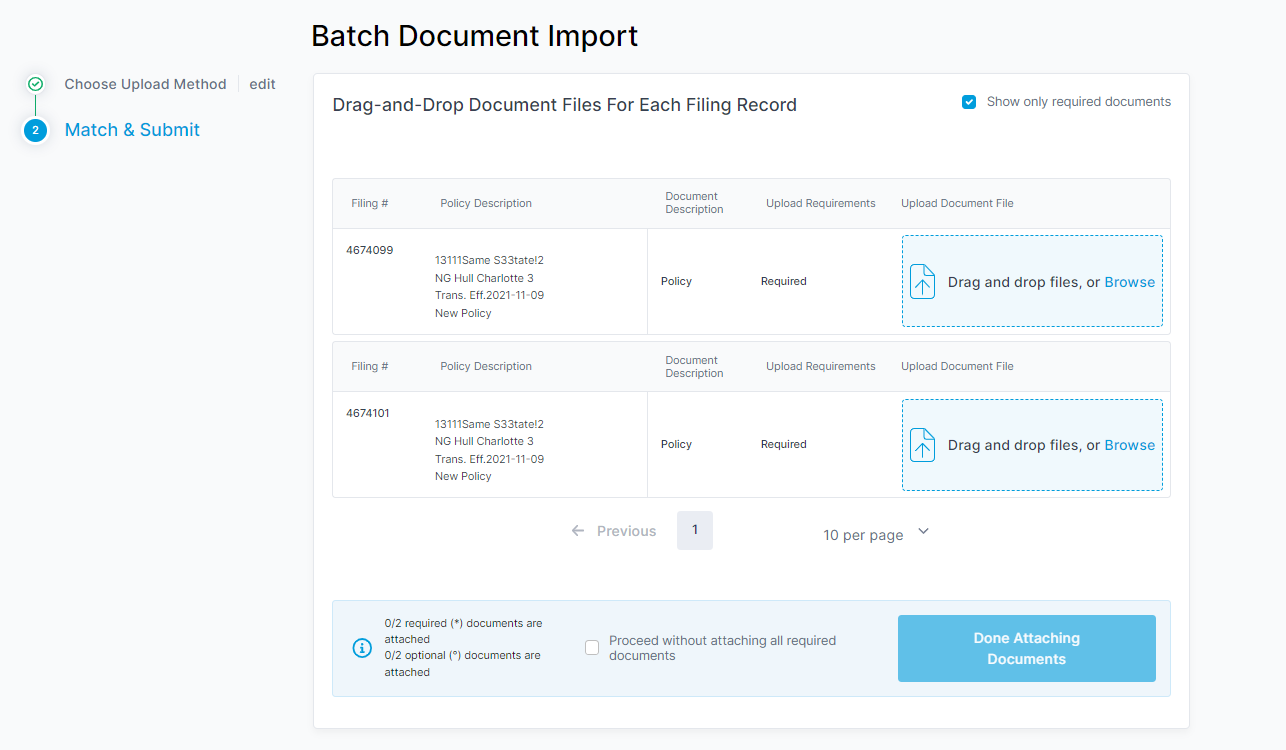
Should you choose this method in Step 1 and click Continue, you will be taken to Step 2 where you will attach your documents one at a time. When you are done, click the "Done Attaching Documents" to complete the import process.
Tips and Tricks
-
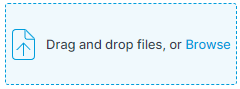
- Consider having two windows open. One with the document importer and the other with your Windows Explorer open. Drag and drop the appropriate policy documents into the correct filing folder.
-
- By default, only "Required documents" appear. However, you can attach optional documents, if you choose to do so, by unchecking the checkbox on the top right corner:

-
- You can choose to proceed without attaching documents. If you do so, you can always come back later and attach any missing documents that remain.

Attach Multiple Files (Advanced)
NOTE: There is currently a limit of 500 transactions that can have documents bulk attached.
Should you choose this method in Step 1, you will be asked to attach one or more policy files as well as a mapping CSV file (which is optional). After you have attached the files, click "Continue" to go to step 2.
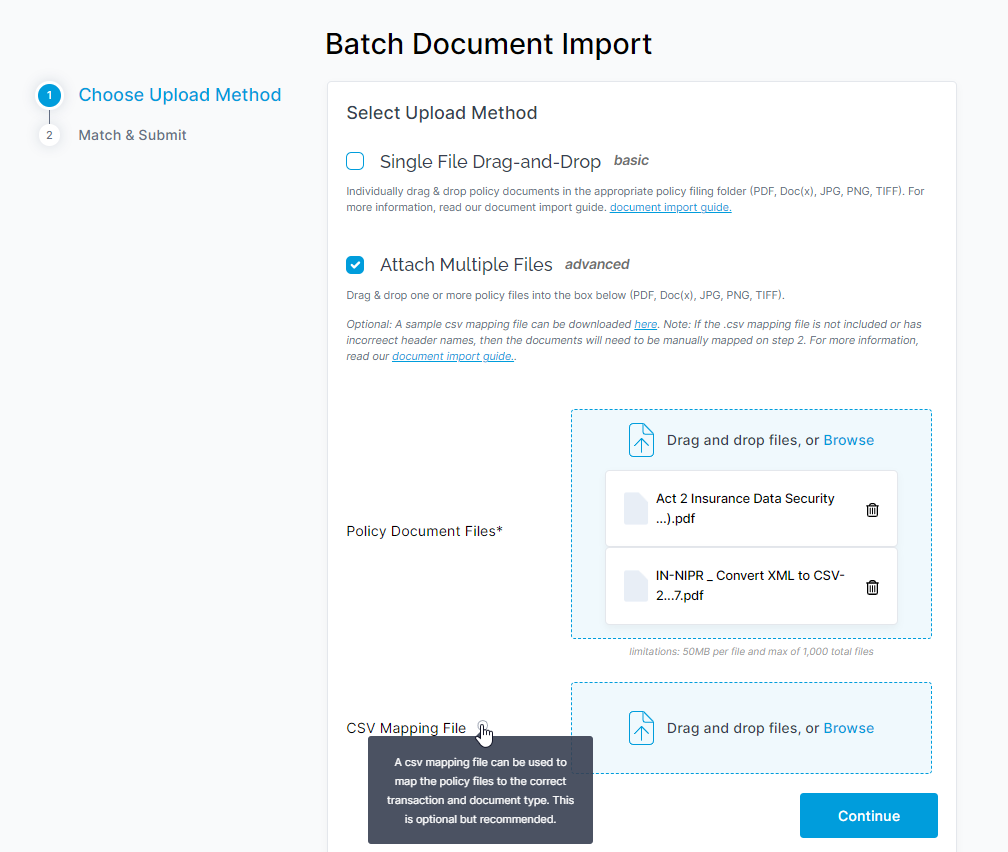
Tips and Tricks
If you are trying to import more than 20 documents at a time, we recommend you consider using a CSV mapping file to make the process of mapping faster.
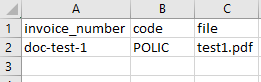
The CSV file must have the following headers in order to be recognized by the InsCipher portal:
| Header Name | Description |
| "invoice_number" |
"invoice_number" = used as a unique transaction ID from your policy management system when importing transactions. |
| "code" |
InsCipher's document code. |
| "file" | This is the exact file name, including the file extension., of the documents you are attaching in the first step. |
If using Excel to populate, the values will look like this:
Sample CSV Document Mapping File
Click here to download the sample file. Ensure that values are in each column to avoid any validation errors.
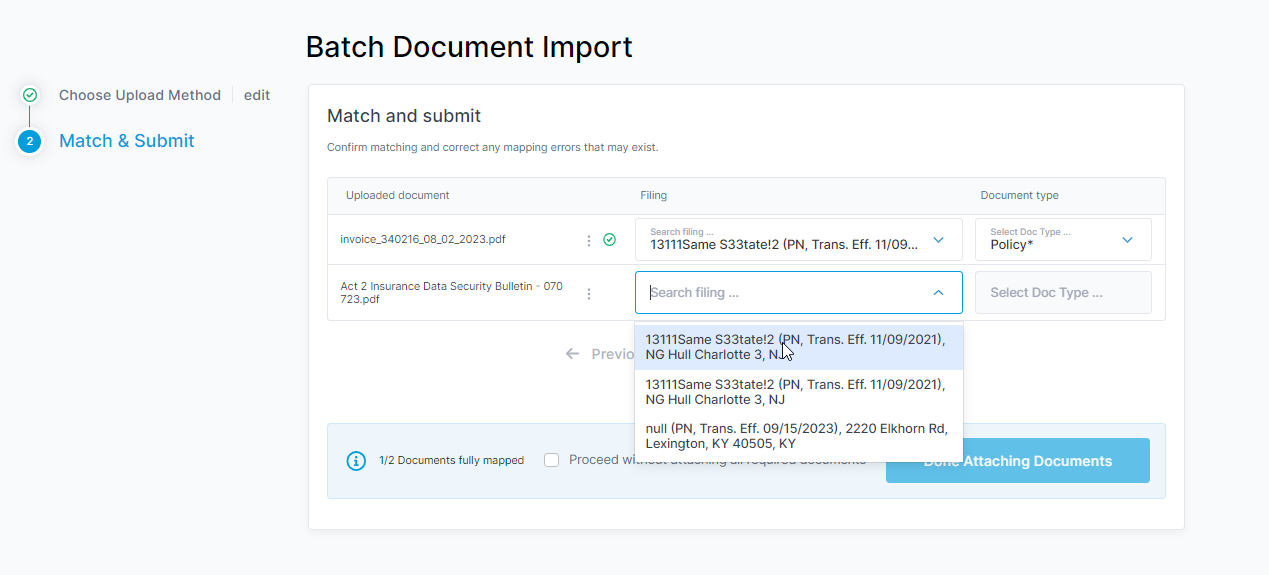
Step 2 of the Attach Multiple Documents Method
Opposite to the single drag and drop approach, in Step 2 of this method, you will be mapping policies and document types to the already attached document files. Like the other methods, however, you don't have to complete the mapping on all files in order to save your progress.
Change History
| Date Updated | Description of Updated |
| 9/19/2023 | Article Created |