
Process for submitting surplus lines transactions into InsCipher
There are a few different ways you can add your transactions into the InsCipher Broker Portal. These are detailed below:
Manual Submission (Simple Entry)
A straightforward, 4-step process of adding Policy Detail, Insured Information, Documents, and Submitting the transaction. Recommended when submitting 20 or fewer transactions in a month.
Step 0: Click "New Filing" or "Tax Calculator"
- New Filing - From the agent "Dashboard" or by clicking the green button on the top right part of the screen.

- Tax Calculator - From the left navigation bar

Step 1: Enter Policy Detail
Note: InsCipher's goal is to standardize the filing process. Since each state is different, we vary the required fields based on the state requirements.
- State - This should be the physical state for the filing. As a courtesy, InsCipher provides Surplus Lines Tax Calculations in all 50 states plus Washington D.C. However, unless you are contracted with InsCipher for Filing Services or Connect access, you can only submit transactions in Utah and Idaho.
- If you are contracted with InsCipher to file and you are unable to submit a transaction for a state, it is because you have not had your licenses and/or login credentials approved. Please contact support@inscipher.com to enable the missing states.
- Please contact info@inscipher.com if you are interested in InsCipher's third-party Filing Services or Connect. You can also learn more by visiting this page.
- Transaction Type - Please ensure you are submitting the appropriate transaction type.
- Positive amounts should be associated with New, Renewal, Additional Premium Endorsements, Audit Endorsements, and Reinstatements
- Negative amounts should be associated with Return Premium Endorsements, Audit Return Premium Endorsements, and Cancellations. The system will force these to be negative.
Note: Not all transaction types are available in all states.
| TRANSACTION NAME | DESCRIPTION |
| New Policy | Newly written policy |
| Renewal Policy | Additional term of a policy previously issued by a carrier |
| Additional Premium Endorsement | An amendment to the policy adding coverage, resulting in additional premium. |
| Return Premium Endorsement | An amendment to the policy removing coverage, resulting in return premium |
| Extension Endorsement | An amendment to the policy extending the expiration date of the original policy |
| Audit Endorsement | Additional premium due after a premium audit was conducted on a policy |
| Audit Return Premium Endorsement | Return premium to the insured after a premium audit was conducted on a policy |
| Zero Premium Endorsement | An amendment to the policy that results in no additional or return premium. This could be a change to the insured location or something else that does not change coverage. |
| Pro-Rata Cancellation | A mid-term policy cancellation. Return premiums are calculated based on how long the policy was in force. |
| Flat Cancellation | A cancellation backdated to the original policy inception date to indicate no coverage provided. This cancellation returns premium and most (if not all) of any state taxes/fees. |
| Reinstatement | Reinstated a canceled policy to original terms. |
- Policy Number - For Renewal Policies and Endorsements, start typing the policy number and you will notice that the system will search for the original policy number. Once you see the correct policy number, click on the number and the system will auto-populate most of the remaining transactional data for you.
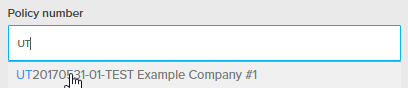
*Note: If you are a new client, this may not appear. Please still include the original policy number on every Renewal and Endorsement transaction that you submit.
- Policy Effective Date, Policy Expiration Date, Premium Adjustment Date, Invoice Date (may not be applicable in certain states), Broker Received Date (Idaho), Issued Date (Hawaii), Revenue Recognition Date (Georgia) - Please make sure that these dates are accurate.
- Export List (may not be applicable in certain states) - This is a Yes/No toggle. Changing this field will change the available "Lines of Business" shown from the drop-down list.
- Line of Business - This is the coverage type associated with the policy. InsCipher provides the state-specific line of business. Several states require that your policy documents match the state-specific line of business name.
- If you have multiple lines of business associated with a policy, select "Multiple Lines of Business" = Yes and add the premium breakdown (option not available in states where only one Line of Business is reported)

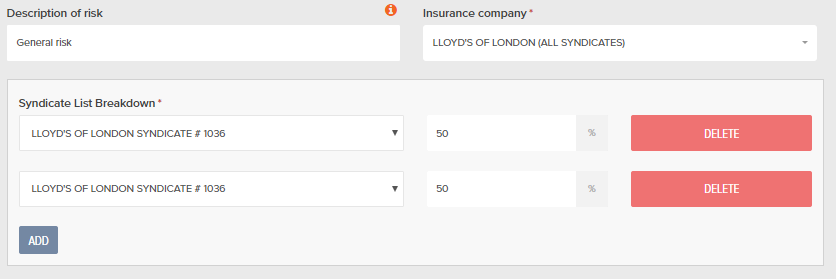
- Description of Risk (may not be applicable in certain states) - This field is limited to just a few states and will show as either a state-specific drop-down list or an open text, where you can add a brief description of the covered risk.
- Insurance Company - This is the carrier underwriting the policy. InsCipher provides the state-approved carrier list for you. If you don't see the carrier on the list, please contact support@inscipher.com.
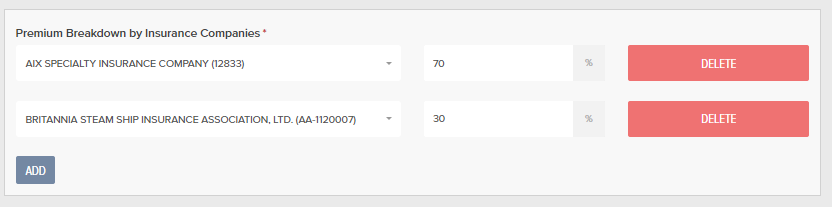
- If you have multiple insurance companies associated to a policy, select "Multiple Insurance Companies" = Yes and add the % breakdown. Total breakdown must equal 100% (option not available in states where only one carrier is reported).
- In certain states, providing a Lloyd's syndicate breakdown may be necessary. The system will prompt you to add this information if applicable. Total breakdown must equal 100%.
- If you have multiple insurance companies associated to a policy, select "Multiple Insurance Companies" = Yes and add the % breakdown. Total breakdown must equal 100% (option not available in states where only one carrier is reported).
- Tax-Exempt - This will only apply for certain types of non-profit and/or government type policies. Should you have questions about what is considered Tax Exempt, please contact the state.
- ECP - Exempt Commercial Purchaser. This is uncommon and therefore is set to "No" by default. Should you have questions about what the Exempt Commercial Purchaser requirements are, please contact the state.
- Policy Limit - This is the entire risk amount associated to the policy.
- If a liability policy, add the highest aggregate amount
- If a property policy, add the total of property coverage
- If a package policy, add the total property coverage and the aggregate amount
- RPG - Risk Purchasing Group. This is uncommon and therefore is set to "No" by default.
- If you mark as "Yes", you will be required to add an RPG Name
- For more information on filing for Risk Purchasing Groups, please click here.
- Account Written As -
- "Brokerage" means that the policy is written through another retail agent (not direct).
- "Direct Client" means that the policy is written directly to the insured.
- During implementation, InsCipher sets the default for your agency for which type of policy is most common.
- Premium, Agency Fee, and Underwriting Fee - InsCipher requires the premium and fees to be broken out separately. This is because states tax differently based off the breakout.
- Agency Fee - Also called the Broker Fee or Policy Fee. This is a fee charged by the Brokerage or Agency (revenue source).
- Underwriting Fee - Also referred to as an Inspection Fee or Audit Fee. This is a fee charged by the carrier and is not retained by the brokerage or agency.
- Fee Restrictions - Certain states have fee restrictions. In these cases, the system may auto-change fees to adjust for these. Example: In New Jersey, the max fee is 2% of the premium OR $100, whichever is greater.
- Tax Calculations - Based on the policy data added InsCipher will calculate the State Taxes and Fees in the "Totals" window (top right of screen).
- Note: State-specific tax and fee names can vary and will display correctly in the "Totals" window.

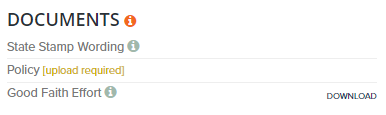
- Documents - InsCipher provides the state-specific documents and policy input fields.
- Documents are not added to the transaction until Step 3, but are shown here for your convenience when quoting/binding the policy.
- State-specific documents are provided for you to download.
- State stamp wording is provided for you. This wording is in the correct format, font, and size that the state requires.
- Certain documents marked as Required are those InsCipher needs to complete the filing to the state.
- Certain documents marked as Optional are those that you need to keep on file but are not required when submitting the filing to InsCipher.
- Documents are not added to the transaction until Step 3, but are shown here for your convenience when quoting/binding the policy.
General Tips & Tricks:
- Fill out the information top-down as certain fields are conditional depending on the previous response.
- Hovering over the "i" icon will define certain fields for you.
- State-specific and policy type "Fee Restriction Notes" and "General Notes" are important for you to read and consider.
If you are adding a Quote, then you can save the policy detail by clicking on "Continue as Quote". For Bound policies where you are approved to file in that State, click "Continue to File" to move onto Step 2.


Step 2: Adding Insured Information
- New Insured - If the insured is new, please fill out the insured information completely.
- If the mailing address differs from the physical address, uncheck the box in front of the "Physical address is same as mailing" and add the physical address as well.
- Existing Insured - If the insured already exists in the system, you can click on the "Existing Insured" tab and search for/select the Insured name. Doing so will auto-populate the insured information.
- If you are adding an endorsement or renewal filing and associated the filing to a previously entered policy (in step 1), then this information will already be filled out for you.
Once completed, click "Continue to File"

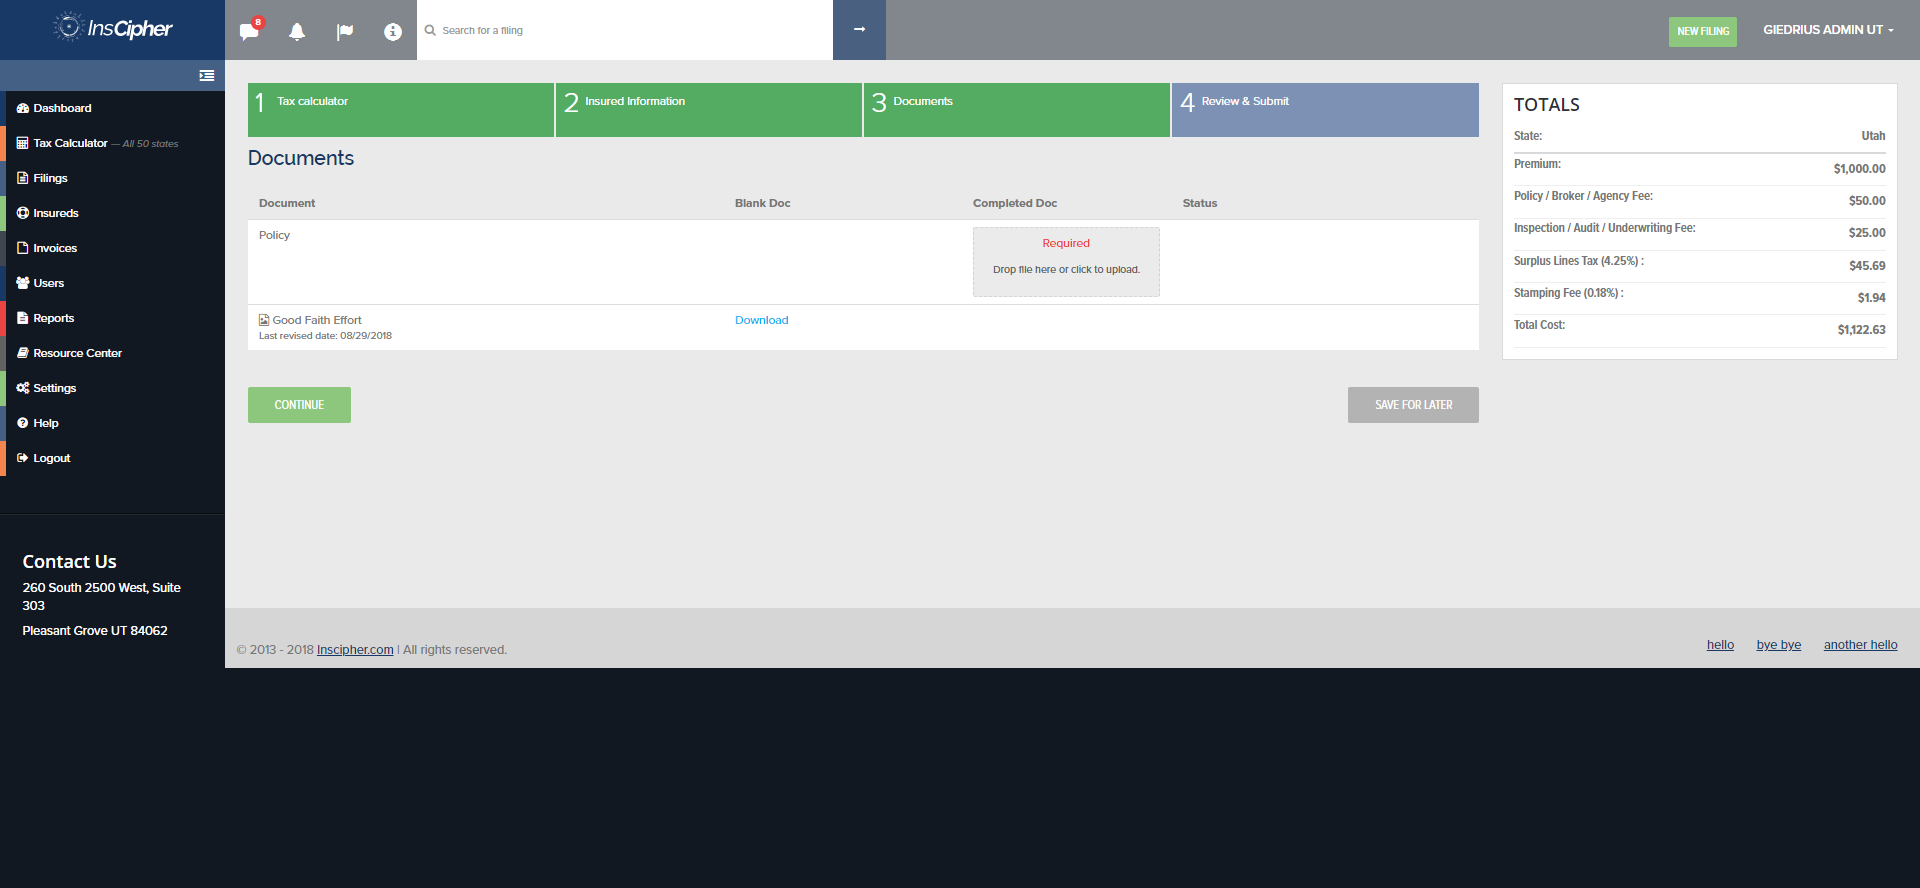
Step 3: Adding Documents
Add documents by clicking on the upload button to select a file or drag-and-drop the related file directly into the window. InsCipher only accepts certain file types (can vary by state), which will be listed in the upload box. By default, accepted file types include PDF, JPEG, TIFF, DOC files. However, there are some cases where this may be different. If there are distinct formats required, this will be listed on the screen. This is because certain states will only accept specific file types.
- Required Documents - These are documents that the state requires when submitting a policy. Without adding these documents, you will be unable to submit the transaction.
- Optional Documents (Filing Service Clients Only) - These are documents that are considered "Optional" from InsCipher's perspective, meaning that we do not need them to file. However, they may be documents that are recommended that you keep on file.
Once completed, click "Continue"

*If you don't have the documents needed, you can click the button to "Save for later", which will keep the transaction in "Saved" status. Once the document is obtained you can search for the transaction and add the relevant document.

To find a previously saved policy, either search for it in the top search bar or filter out your filings list on the "Filings" page.
Step 4: Review & Submit
This last step is about making sure that the policy data is correct before filing. If there is any missing data, there will be red validation errors informing you of what needs to be added.

- Filing under license - Please check to ensure that the correct licensee associated to the transaction is selected. If it is not, please select the correct licensee.

- Notes - If there are any specific notes you wish to add concerning this transaction, please add this information in the notes.

- Editing - If you need to edit any section of the transaction, click on the "Edit" button next to that section and change that section and then click Continue to go back to Step 4.

Once the filing is complete, click "Submit Filing"

*After you submit, the status of the transaction will change to "Submitted". You have the option to Edit any section, Delete the Filing, Print the Page, or Contact InsCipher about the transaction.
- Actions:


![]()
Watch a Demo
Do you still have questions about how to manually add a filing to the system? Watch this tutorial, which is designed for our filing service clients but also applies to Utah and Idaho transactions as well:

Batch Import (Intermediate)
Consider using the batch import tool if you are submitting more than 20 transactions in a month.
Users should be very familiar with importing .csv transactions and troubleshooting import errors before attempting to use this functionality.
Specific instructions on how to batch import filings can be found here and do vary a little bit depending on the state.
API Submission (Advanced)
Consider using the API Submission process if you are submitting more than 100 transactions in a month. Agencies will need the technical assets in-house in order to set up and maintain this functionality. InsCipher offers this as a paid solution for interested clients that want to help automate the submission process. Please email info@inscipher.com if you are interested in this option.
Revision History:
| Date | Edit |
| 12/01/2022 | Reviewed for accuracy |